Installing poster printers on a Mac
PLEASE NOTE: Specialised poster printing and collection is UNAVAILABLE until further notice.
To install the poster printers on your Mac you need to complete two stages: install the driver software then create the definition for the printer in the built-in printer system (CUPS).
Stage 1 – Download and install the drivers
Before you can use the poster printers from your Mac, you will need to install the drivers which can be downloaded from Apple.
1. Open your web browser and navigate to http://support.apple.com/kb/DL907
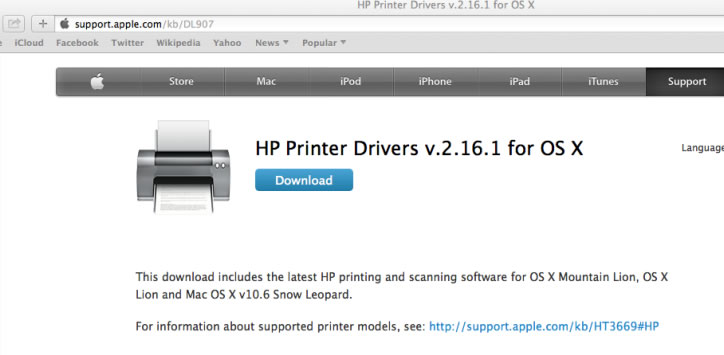
2. Click the Download button, this will download a Mac OSX disk image file (.dmg file)
3. Double click the .dmg file
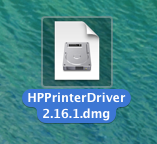
4. This will open a new window containing a .pkg file
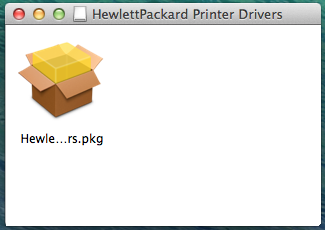
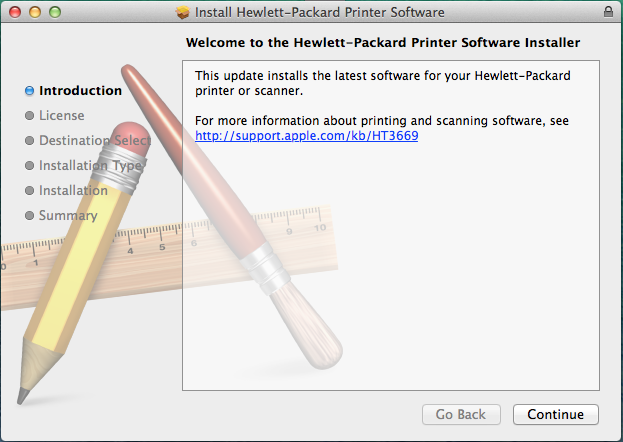
5. Double click the .pkg file, this will open the installer program
6. In the connection box cut and paste (or carefully type) in one of the following:
For A1 printing:
https://miscprint.liverpool.ac.uk/printers/CSD-PosterNarrow/.printer
For A0 printing:
https://miscprint.liverpool.ac.uk/printers/CSD-PosterWide/.printer
For Glossy printing:
https://miscprint.liverpool.ac.uk/CSD-PosterWideGlossy/.printer
7. Accept the terms and conditions and click Continue again (you may need to supply your Mac user account details).
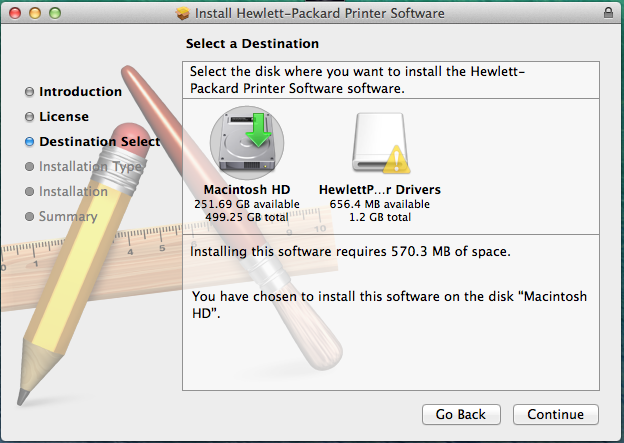
8. Select the Macintosh HD icon then click Continue.
9. A progress bar will appear and after a few minutes the installer will finish. Click Close.
Stage 2 – Enter the driver details into CUPS
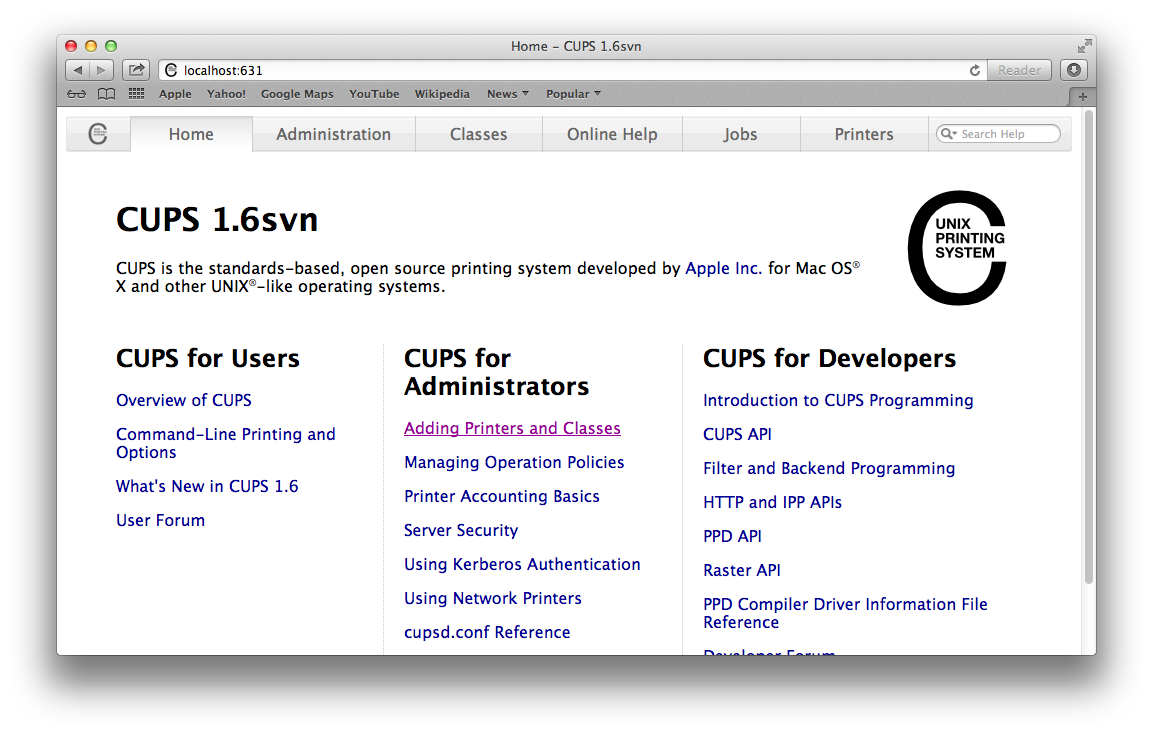
1. Open Safari, Type localhost:631 into the address bar (note you will need CUPS 1.4 version).
2. Click the Adding Printers and Classes link.
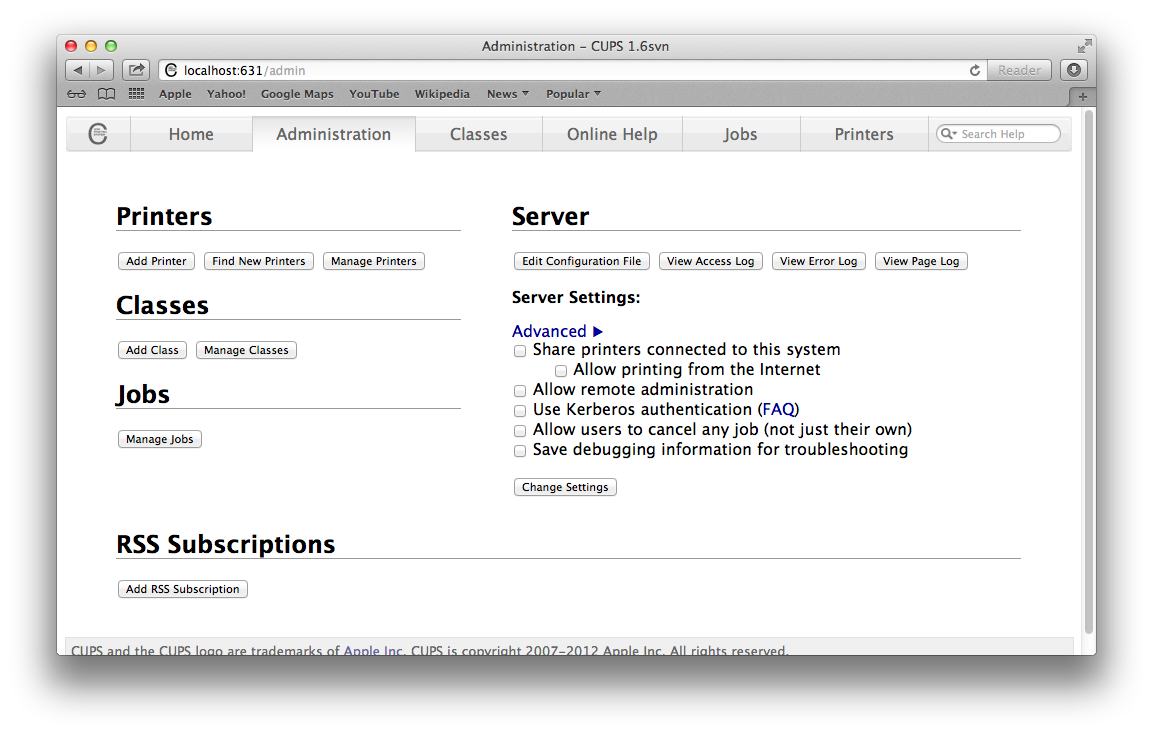
3. Click Add Printer.
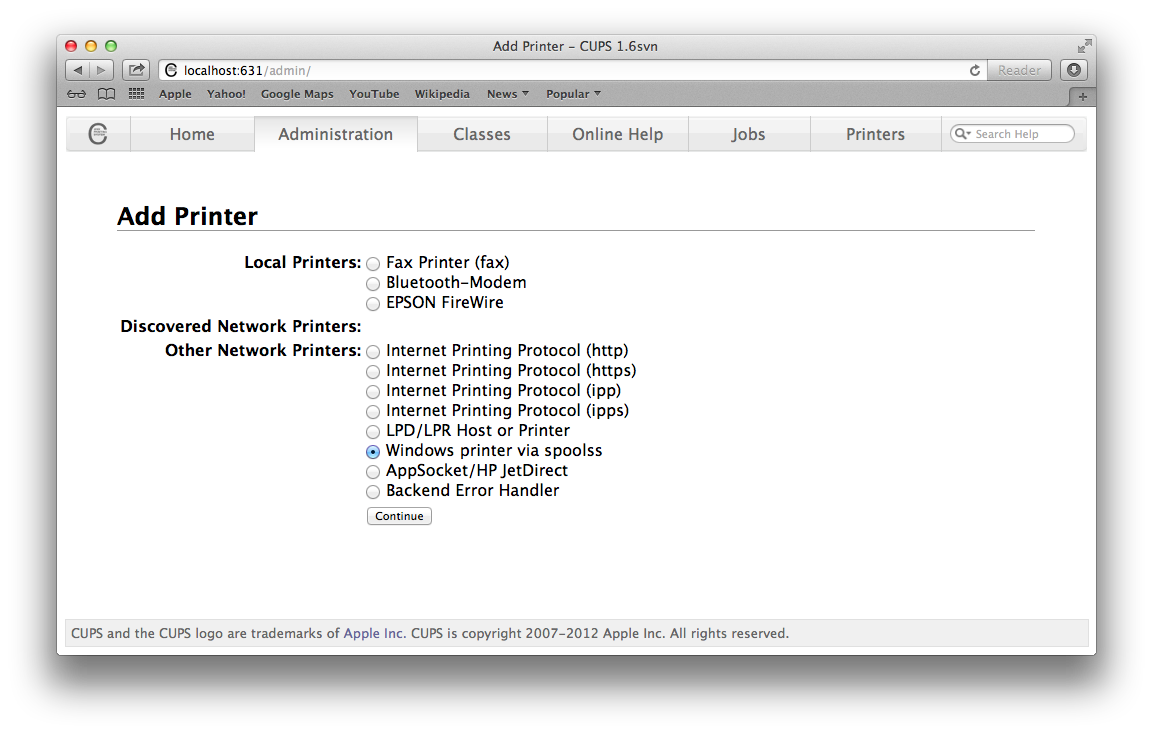
4. Check the radio button next to Windows Printer via spools.
5. Click Continue.
6. In the connection box type one of the following:
For A0 printing:
- smb://print5.livad.liv.ac.uk/CSD-PosterWide
For A1 printing:
- smb://print5.livad.liv.ac.uk/CSD-PosterNarrow
For Glossy printing:
- smb://print5.livad.liv.ac.uk/CSD-PosterWideGlossy
7. The example below shows instructions for the Poster Wide queue.
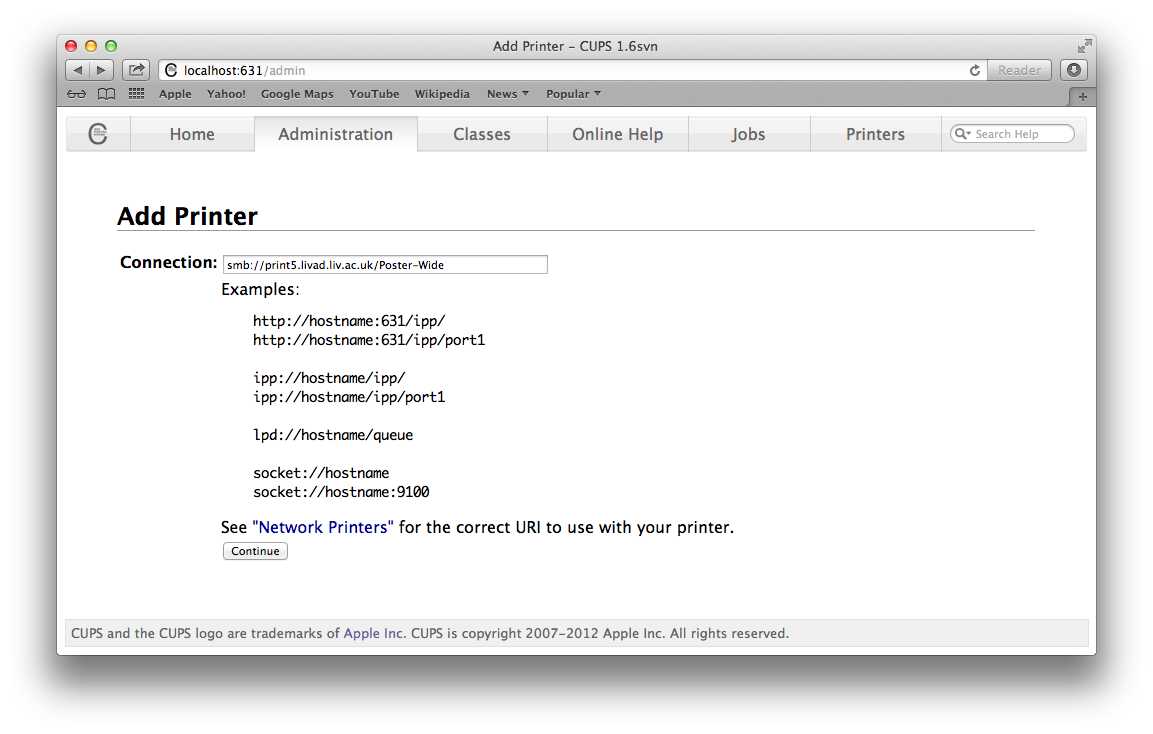
8. Click Continue.
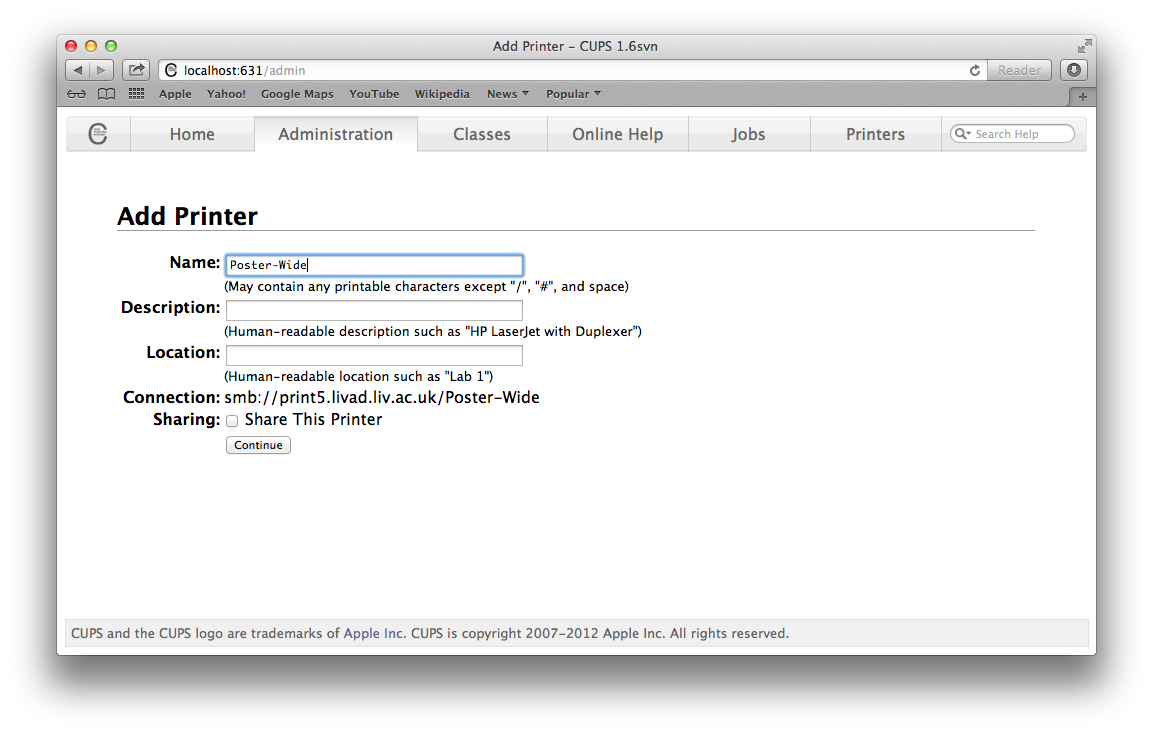
9. Give the printer a name. It is good practice to name the printer after the queue name you are connecting to.
10. Click Continue.
11. In the drop down box next to Make: select H” then click Continue.
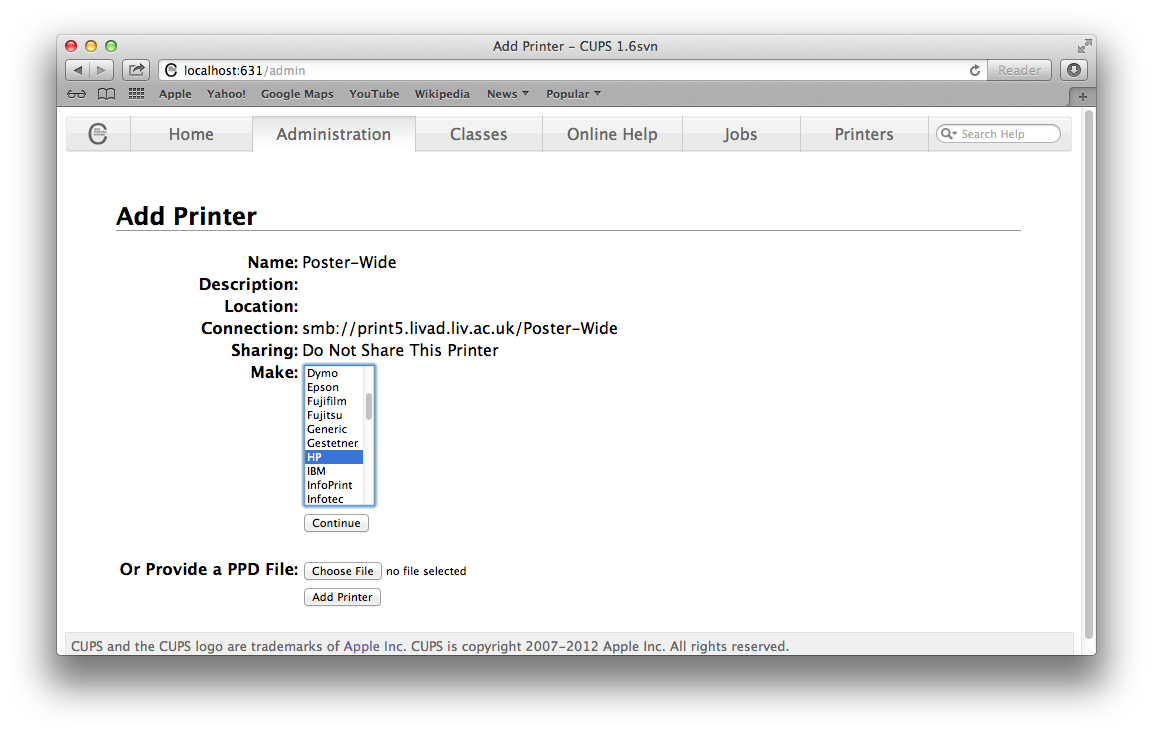
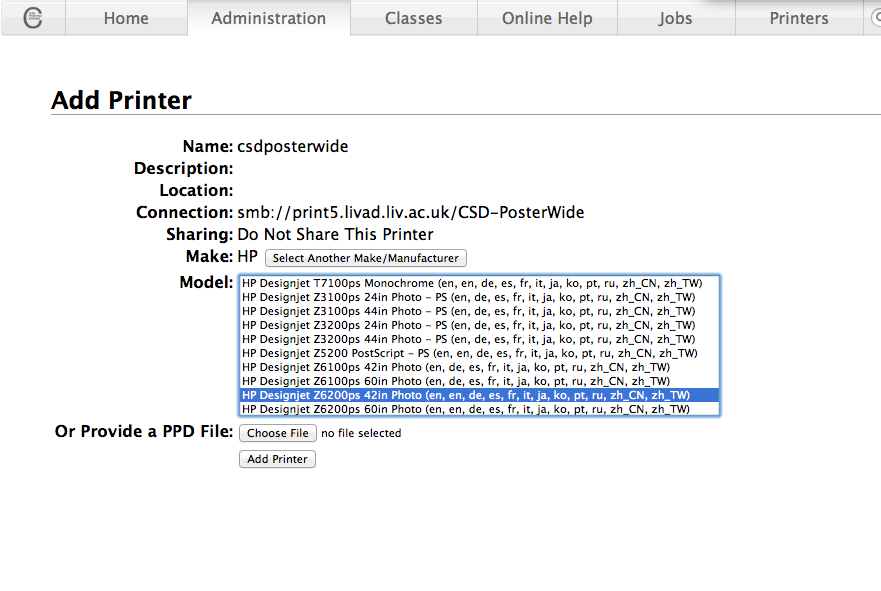
12. From the drop down menu next to the Model: select HP Designjet Z6200ps 42 inch photo.
13. Click Add Printer.
14. For Poster Wide set the media size to A0. For Poster Narrow, set the media size to A1.
15. Set Print with margins to standard and then click on the Set Default Options button.

16. This screen is the spooler page for the printer and will only exist if the printer has been installed correctly.
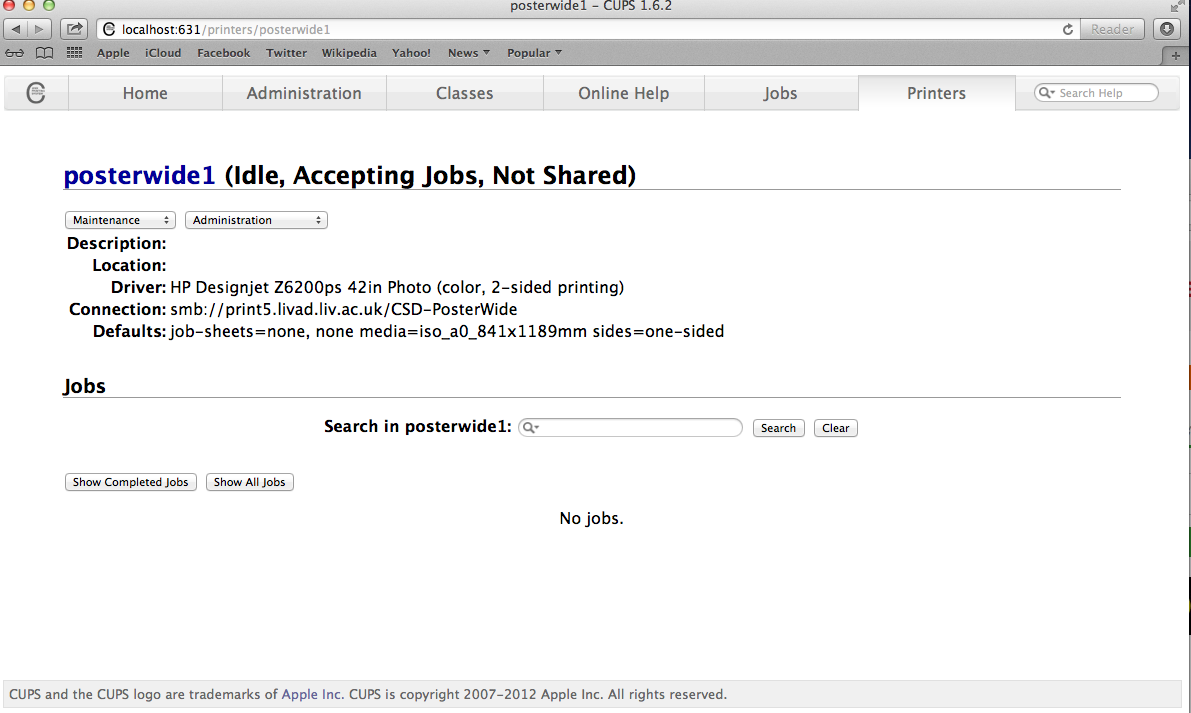 17. You can now close the browser window.
When printing to the Poster printers (wide and narrow) you must change the paper size in printer properties.
18. Open the document you wish to print, select File > Print ensure the correct printer is selected.
19. Click on Page Setup.
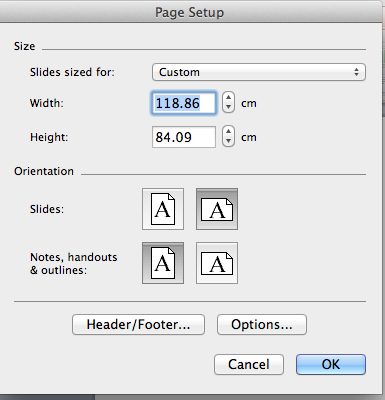
Ensure the dimensions are set correctly
For the poster narrow printer change the paper size to A1 and dimensions to 84.09cm by 59.4cm
20. Then select Options.
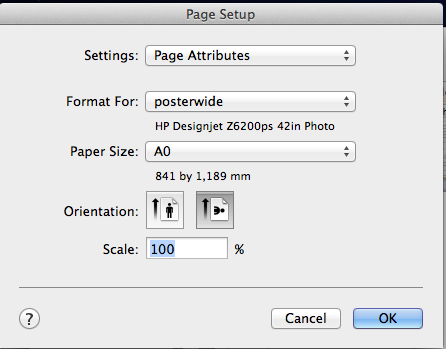
21. Double check the settings are correct then select OK. ClickOK again then select Print.