Backing up your emails using Outlook
When graduating or leaving the University, you can take a copy of your emails before you leave by following the instructions below.
Members of staff should be aware that there will be legal requirements, University policy and contractual obligations, including specific confidentiality clauses or settlement agreements, that staff must comply with when exiting University employment. These obligations will limit what information or emails staff/employees are allowed to retain, extract or take copies of before leaving - see the advice in our knowledge article.
It is recommended to use Outlook to to backup your University emails.
Backing up your email using Outlook
Double click the Outlook icon on your desktop. If prompted, log on with your university computing accout credentials, entering your email address in the format username@liverpool.ac.uk.
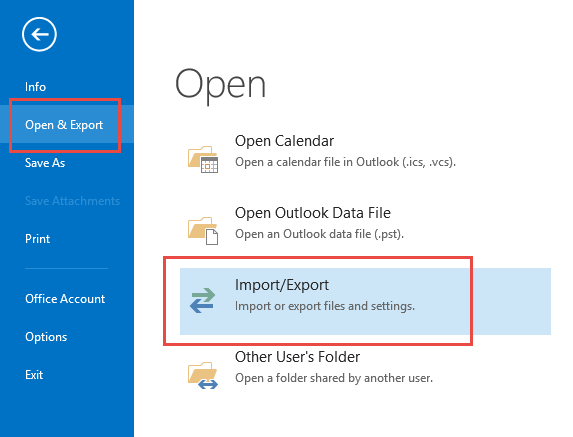
From your inbox click on File | Open & Export | Import/Export
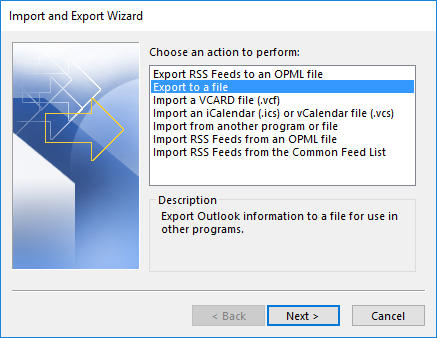
The Import and Export Wizard will open. Under Choose an action to perform: select Export to a file and click Next
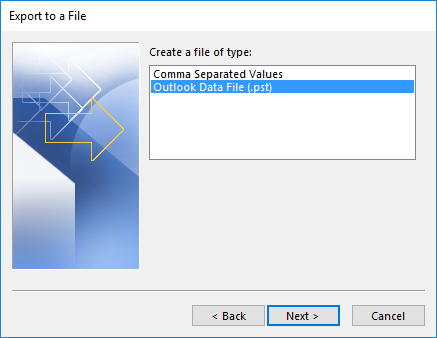
On the Export to a file page select Outlook Data File (.pst) and click Next
Select the top most folder titled username@liverpool.ac.uk. Place a tick next to Include subfolders and then click Next
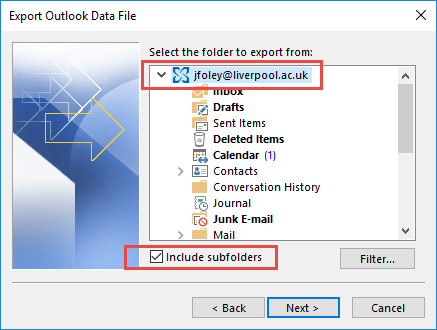
If you don't want to backup your entire mailbox then just select the folder you would like to backup, for example Contacts and then click Next when ready.
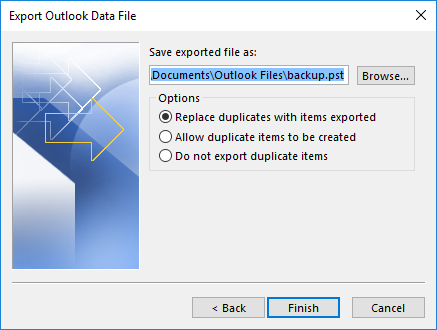
Select where you would like to save the backup file. By default, your backup will be saved to the following location: C:\Users\your_username\Documents\Outlook Files\backup.pst. To change this click on the Browse… button and navigate to where you would like to save the file.
Under Options select Replace duplicates with items exported.
Click Finish when ready
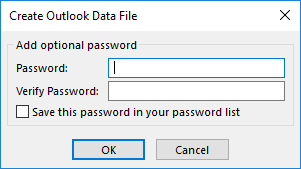
You can specify a password for your backup in the Create Outlook Data File window if you wish.
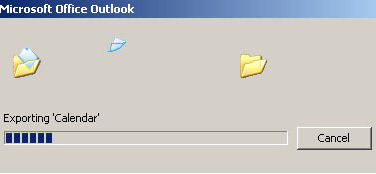
Outlook will then begin the process of backing up your mailbox to the file you specified. This may take several minutes.
When complete you can navigate to the specified location that you saved the file to. When you have found the file you can copy this to your personal storage device such as a usb pen drive to take away with you. Please make sure that your storage device has enough empty space available as email backups can be quite large depending on the size of an individual's mailbox.
Accessing your backed up emails in Outlook
Once you have taken a copy of your emails and have them stored in a .pst file as described above, you will be able to access these emails by importing this file into another installation of Outlook (some other emai clients also support import of Outlook .pst files).
Save the export .pst file to a location on your computer.
If required, follow the links for instructions on creating a new profile in Outlook. If for example you are using Outlook in a new workplace then you will need to find out the appropriate server information etc. for your environment in order to connect your profile to an account.
Log into the new profile and then go to File | Open | Import
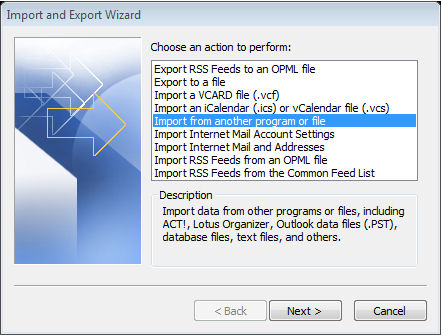
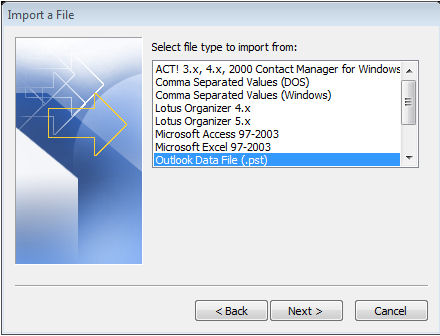
Select Import from another program or file and click Next
On the Import a file page select Outlook Data File (.pst) and click Next
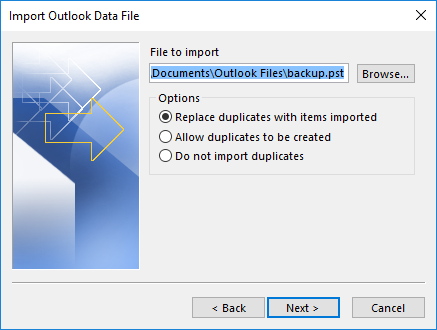
On the Import Outlook Data File page, click the Browse… button, locate your backup file and then double click the file. Ensure that Replace duplicates with items imported is selected and then click Next
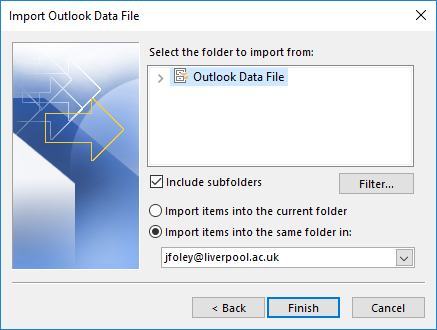
Select the top level folder (or whichever folders you want to import) and ensure that there is a tick next to Include subfolders.
Select Import items into the same folder in:
Select the appropriate folder from the drop down menu that you want your emails to be imported into and click Finish.
Your University mails will then be imported into your personal Outlook account. This may take several minutes depending on the number of emails that were backed up.