Upload
There are three ways of uploading documents into Serengeti:
- Using the Serengeti plugin from a Microsoft Office application such as Microsoft Word, or Outlook;
- Using 'drag 'n drop' functionality from the Advanced Upload tool in the Actions menu in Serengeti; or
- By navigating to the student's folder and uploading a document to that folder in Serengeti.
The quickest method is to use the Serengeti plugin but if you are uploading a large number of documents to a folder at once then you may wish to use the Advanced Upload tool to 'drag 'n drop' the files into Serengeti. The slowest method is to navigate to a student's folder first and to then upload a file to that folder in Serengeti: this may be useful if you are already working within Serengeti and within a specific student's folder.
Using the Serengeti plugin
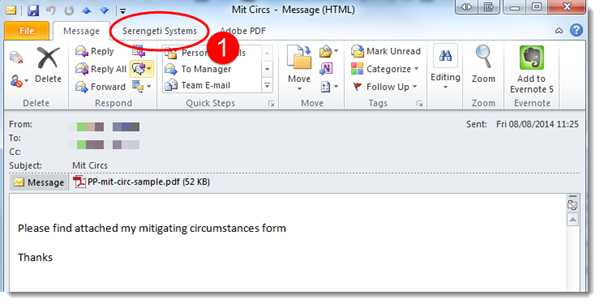
After you have installed the Serengeti plugin you will see an additional tab, called Serengeti Systems, in Microsoft Word, Excel and Outlook which you can use to directly upload a document into Serengeti. Please note: if you are using Outlook to upload an email, you will need to fully open the email first, by double clicking on it in your inbox, before you will see the Serengeti Systems tab.
These instructions show how to upload an email (and attachment) to Serengeti from Outlook and may differ slightly for Microsoft Word or Excel.
- With the email opened fully in Outlook (double click on it from your inbox), click on the Serengeti Systems tab
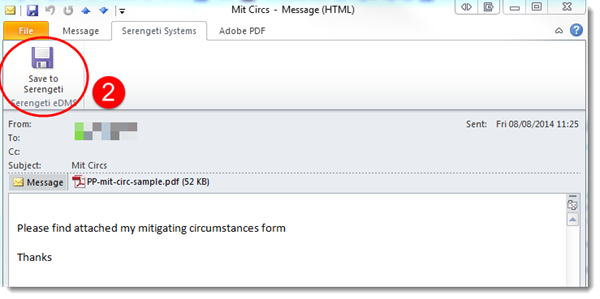
- Click on the Save to Serengeti button
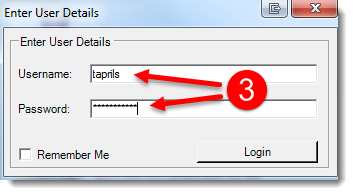
- Enter your MWS username and password when prompted
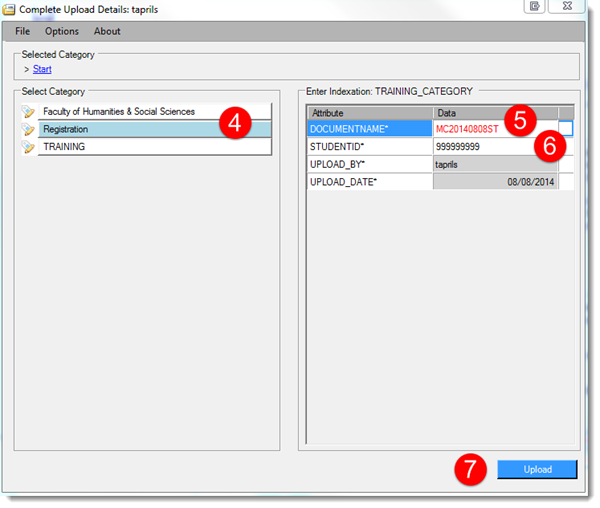
- Select the category (i.e. Faculty) to upload the document to (e.g. HSS for Faculty of Humanities and Social Sciences)
- Provide the document with a name following the agreed file naming convention
- Input the student ID number to upload the document to the student's folder. NB. If a folder has not yet been created, because this is the first document to be uploaded for a student, Serengeti will automatically create the folder for you at this stage
- Click on the Upload button
You will see a pop-up confirmation message in the task bar to indicate that your file has been uploaded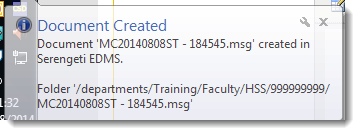
Using the 'drag 'n drop' tool
You may wish to upload a number of documents to a student's folder in Serengeti in one go (i.e. bulk upload): to do this, you can take advantage of 'drag 'n drop' functionality. Please note: all files uploaded through a bulk upload via 'drag 'n drop' will be given the same filename in Serengeti.
Log in to Serengeti as usual and follow these instructions to upload one or more files via 'drag 'n drop':
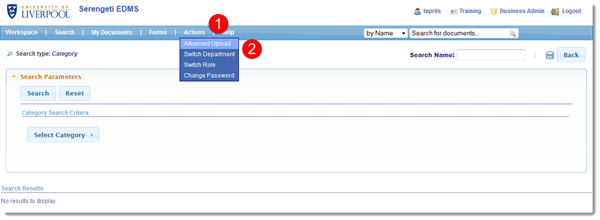
- Click on the Actions menu
- Select Advanced Upload from the dropdown list
You will see a confirmation message informing you whether your browser is compatible with 'drag 'n drop': if this message does not appear, please try a different web browser such as Internet Explorer or Firefox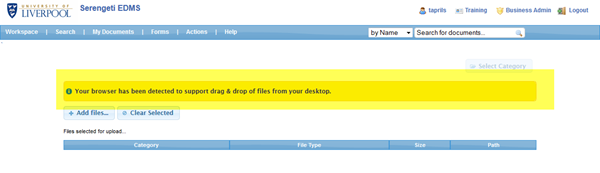
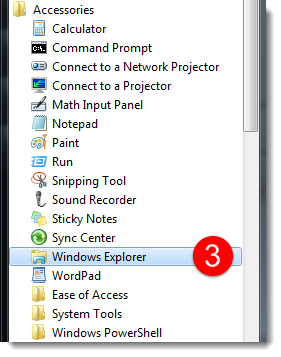
- Open Windows Explorer from the Start Menu (Start > All Programs > Accessories > Windows Explorer)
- Return to Serengeti and EITHER click on the Add Files button to upload a single file (navigate to the file you wish to upload from the window which then appears) OR
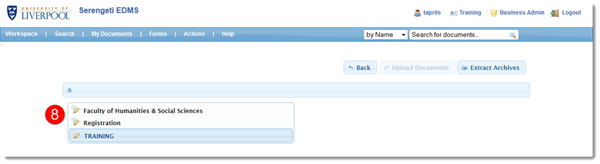
- To upload multiple documents, position your Windows Explorer window so that you can see Serengeti in the background (as shown in the image below) and select the files you wish to upload (use CTRL+left click to select multiple files)
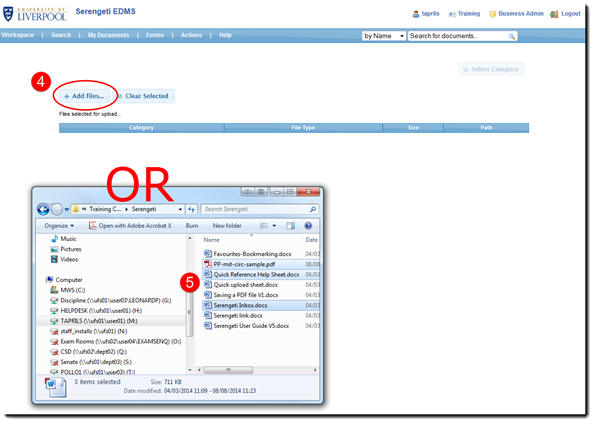
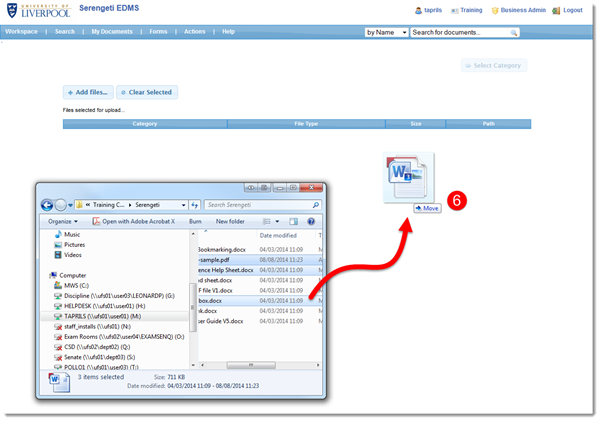
- Drag and drop the files from the Windows Explorer window into the Serengeti window
- Click the Select Category button
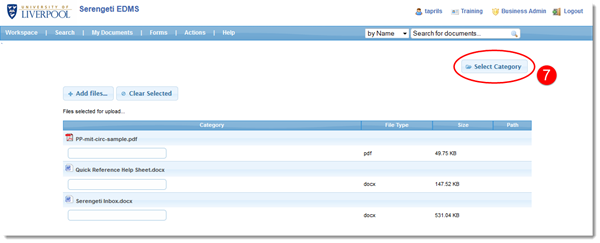
- Select the appropriate area, e.g. Faculty of Humanities and Social Sciences, from the list
- Enter the document name which will be applied to all of the documents you are uploading
- Input the student's ID number
- Click on the Upload Documents button to begin the upload
A progress bar will be displayed next to each document as it is being uploaded - this will then be replaced with a list of uploaded documents as shown below: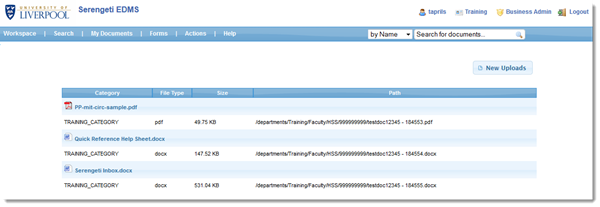
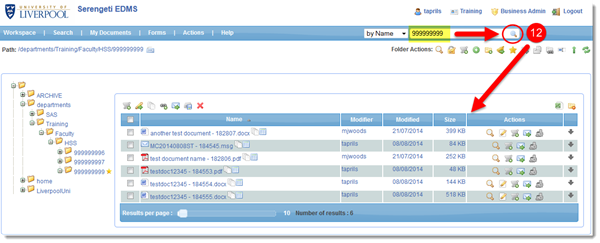
- To check that the document(s) uploaded successfully, search for the student's folder by entering the ID number in the search box (ensuring that by Name is selected for the search type)
Uploading a document from within a folder in Serengeti
If you wish to upload a document to a folder whilst you are working within Serengeti itself, follow these step-by-step instructions after you have logged in:
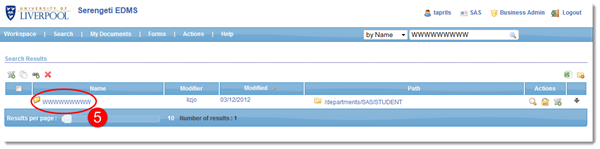
- Click on Workspace
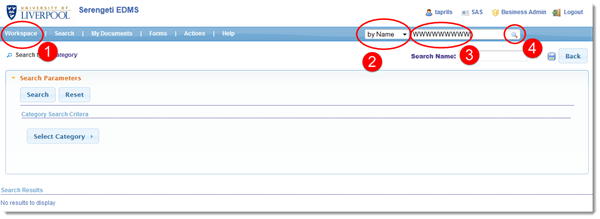
- Ensure the drop down menu for the search options is set to by Name
- Enter the student ID
- Click on the search icon
- Once the search is complete, you will see the student's folder listed in the search results. Click on the folder name to continue
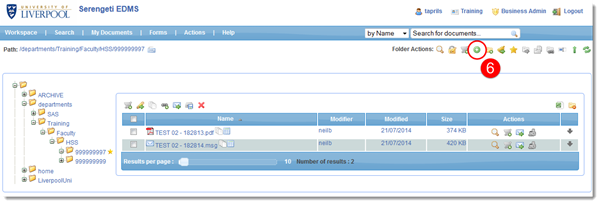
- You can quickly upload any document to the folder you have navigated to by clicking on the green plus icon near the top of the screen under Folder Actions
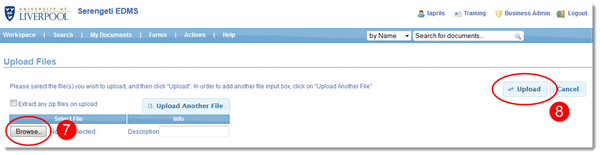
- Click on the Browse button and navigate to the location of the document you wish to upload into Serengeti (e.g. a file on your M drive). Once you have selected a file, it will appear in the list of 'Selected Files'
- Click on the Upload button to continue
- You will see a confirmation message that your file has been uploaded - click on the Finish button to return to the student's folder
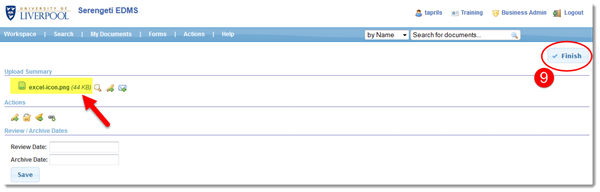
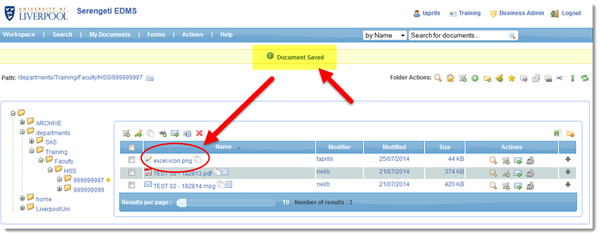
You will then see another confirmation that the document has been saved, and you should be able to see it listed alongside the other documents in the folder